이미지 탐지 하는 API 개발
- boto3을 이용해서 S3에 업로드하기
API 설계하기 전,
AWS S3 버킷 생성 하기
https://msdev-st.tistory.com/155
[AWS] S3 버킷 만들기 _ 스토리지 만들어서 사용하기
S3 버킷 만들기 _ 스토리지 만들어서 사용하기AWS의 S3란? Simple Storage Service의 약자로 파일 서버의 역할을 하는 서비스다. 일반적인 파일서버는 트래픽이 증가함에 따라서 장비를 증설하는 작
msdev-st.tistory.com
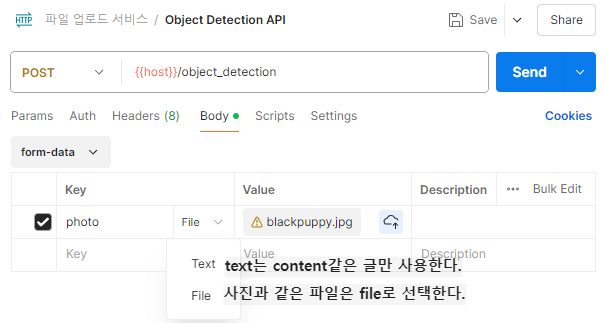
Postman을 활용한 API 설계
- 사진 / 파일을 요청하려면 Body에 form-data를 사용해서 request 한다.
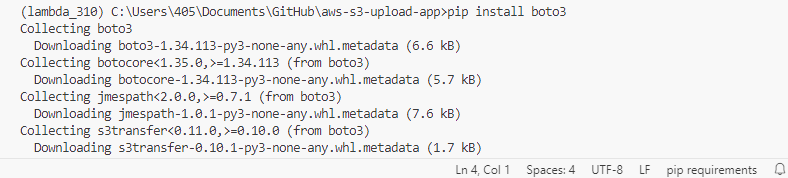
API 개발 중인 가상환경에,
파이썬 코드로 AWS의 여러 서비스들을 사용할 수 있도록,
AWS가 만들어준 라이브러리를 설치한다.
$ pip install boto3
깃허브랑 연동하고,
API 개발 환경 모두 설정한다 (app.py, .gitignore, requiremenrs.txt, serverless.yml 등...)
detection과 recognition 하는 코드 작성
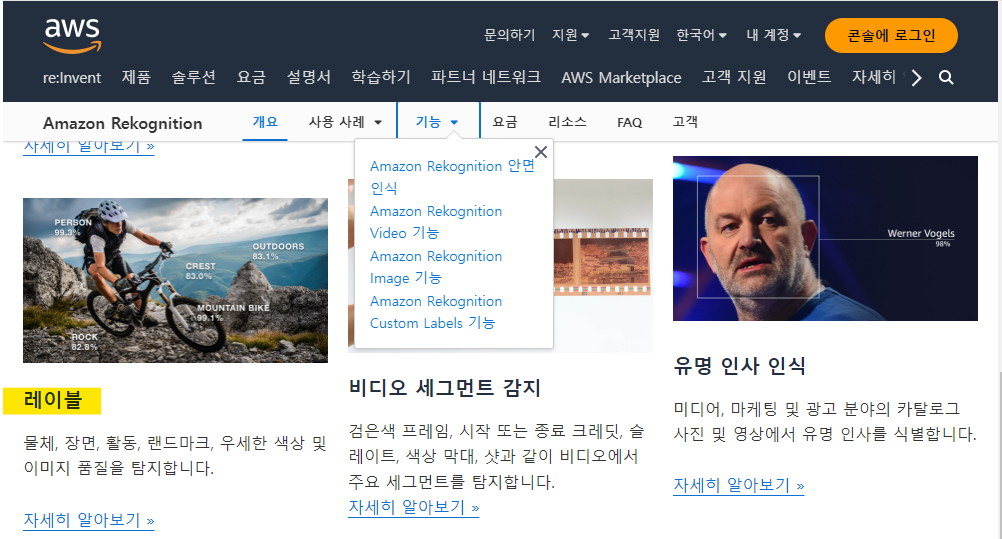
- Amazon rekognition에서 이미지 레이블을 인식하는 기능을 사용할 것이다.
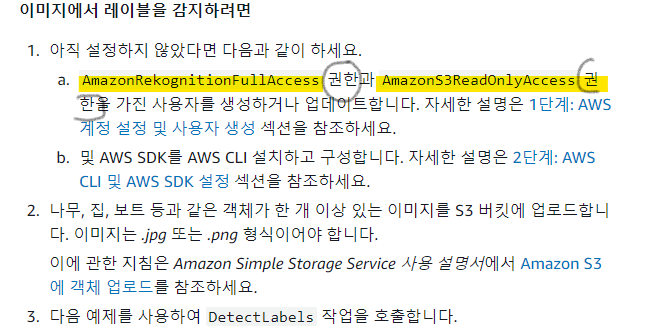
- Amazon rekognition의 개발자 가이드를 보면(https://docs.aws.amazon.com/ko_kr/rekognition/latest/dg/labels-detect-labels-image.html), 권한을 설정해야 한다고 한다. 그래서 AWS IAM 내 쓰고 있는 사용자의 권한을 추가해 준다.
- 코드 작성 중 label 함수가 있는데 *Amazon rekognition의 개발자 가이드에 쓰여있는 파이썬 코드를 참고해서 작성했다.
- 코드 작성
from flask_restful import Resource
from flask import request

from datetime import datetime

import boto3

from config import Config

class ObjectDetectionResource(Resource):

    def post(self) :

        # 사진파일이 있는지 확인
        if 'photo' not in request.files :
            return {"result":"fail", "error":"사진은 필수입니다."}, 400

        # 사진을 file 변수로 저장
        file = request.files['photo']

        # 사진의 content type이 이미지가 아니면 실행되지 않도록 작성
        if 'image' not in file.content_type :
            return {"result":"fail", "error":"이미지파일을 업로드 하세요."}, 400

        # 파일 이름 유니크하게 현재시간으로 설정
        current_time = datetime.now()
        file_name = current_time.isoformat().replace(':','_') + '.jpg'

        # 파일이름을 유니크하게 만든 파일이름으로 저장
        file.filename = file_name

        ### S3에 업로드 ###
        # rekognition 서비스를 이용하려면,
        # 먼저 S3에 이미지 파일을 업로드 해놔야 한다!!!!
        client = boto3.client('s3',
                     aws_access_key_id = Config.AWS_ACCESS_KEY,
                     aws_secret_access_key = Config.AWS_SECRET_ACCESS_KEY)

        # client 한테 일 시키기
        try :
            client.upload_fileobj(file,
                                  Config.S3_BUCKET,
                                  file_name,
                                  ExtraArgs = {'ACL' : 'public-read',
                                               'ContentType':'image/jpeg'})
        except Exception as e:
            return {"result":"fail", "error":str(e)}, 500

        # 리코그니션을 이용한다.
        # label_list 는 밑에 함수에서 만들어져왔다.
        label_list = self.detect_labels(file_name, Config.S3_BUCKET)

        print(label_list)

        return {"result":"success", "lables": label_list}


    # Amazon rekognition 에 개발자 가이드에 있는 파이썬 코드
    def detect_labels(self, photo, bucket):

        # 개발자 가이드에 있는 부분을 삭제하고 나의 키를 넣어서 만들었다.
        client = boto3.client('rekognition',
                     'ap-northeast-2',
                     aws_access_key_id = Config.AWS_ACCESS_KEY,
                     aws_secret_access_key = Config.AWS_SECRET_ACCESS_KEY)

        response = client.detect_labels(Image={'S3Object':{'Bucket':bucket,'Name':photo}},
        MaxLabels=10,
        # Uncomment to use image properties and filtration settings
        #Features=["GENERAL_LABELS", "IMAGE_PROPERTIES"],
        #Settings={"GeneralLabels": {"LabelInclusionFilters":["Cat"]},
        # "ImageProperties": {"MaxDominantColors":10}}
        )

        print('Detected labels for ' + photo)
        print()
        print(response['Labels'])

        lable_list = []

        for label in response['Labels']:
            print("Label: " + label['Name'])
            lable_list.append(label['Name'])

        return lable_list
* detection과 recognition의 차이
영상에서 대상을 찾는 것은 detection,
찾은 대상이 무엇인지 식별하는 것은 recognition입니다.
예) 얼굴인식의 경우 먼저 영상에서 얼굴을 찾은(detection) 후 찾아진 얼굴이 DB에 등록된 얼굴인지를 식별(recognition)하는 과정을 거칩니다.
즉, recognition은 일종의 identification 개념입니다.
참고 자료. 관련 더 자세한 설명. https://darkpgmr.tistory.com/136
Detection, tracking, recognition의 차이
댓글로 문의해 주신 내용인데, 답글을 달다가 게시글로 올려도 괜찮겠다 싶어서 따로 글로도 올립니다. 비전, 영상처리에서 나오는 용어로 detection(검출), tracking(추적), recognition(인식)이 있습니
darkpgmr.tistory.com
* 설치 라이브러리 설명 사이트 : boto3
https://pypi.org/project/boto3/
* 파일 타입 -> file.content_type
: 예 ) 'image/jpeg', 'image/png'
사이트에서 원하는 타입을 찾아 파일 타입 작성하면 된다.
https://developer.mozilla.org/en-US/docs/Web/HTTP/Basics_of_HTTP/MIME_types/Common_types
* Amazon rekognition
https://aws.amazon.com/ko/rekognition/?nc=sn&loc=1
이미지 인식 소프트웨어 - ML 이미지 및 비디오 분석 - Amazon Rekognition - AWS
검은색 프레임, 시작 또는 종료 크레딧, 슬레이트, 색상 막대, 샷과 같이 비디오에서 주요 세그먼트를 탐지합니다. 자세히 알아보기 »
aws.amazon.com
* 이미지에서 레이블 감지하기 관련 개발자 가이드
https://docs.aws.amazon.com/ko_kr/rekognition/latest/dg/labels-detect-labels-image.html
이미지에서 레이블 감지 - Amazon Rekognition
기계 번역으로 제공되는 번역입니다. 제공된 번역과 원본 영어의 내용이 상충하는 경우에는 영어 버전이 우선합니다. 이미지에서 레이블 감지 이 DetectLabels작업을 사용하여 이미지에서 레이블 (
docs.aws.amazon.com
* Amazon rekognition 개발자 가이드 코드 (파이썬)
def detect_labels(photo, bucket):

     # 이부분을 나의 엑세스 키가 있는 코드로 변경
     session = boto3.Session(profile_name='profile-name')
     client = session.client('rekognition')
     #

     response = client.detect_labels(Image={'S3Object':{'Bucket':bucket,'Name':photo}},
     MaxLabels=10,
     # Uncomment to use image properties and filtration settings
     #Features=["GENERAL_LABELS", "IMAGE_PROPERTIES"],
     #Settings={"GeneralLabels": {"LabelInclusionFilters":["Cat"]},
     # "ImageProperties": {"MaxDominantColors":10}}
     )

     print('Detected labels for ' + photo)
     print()
     for label in response['Labels']:
         print("Label: " + label['Name'])
         print("Confidence: " + str(label['Confidence']))
         print("Instances:")

         for instance in label['Instances']:
             print(" Bounding box")
             print(" Top: " + str(instance['BoundingBox']['Top']))
             print(" Left: " + str(instance['BoundingBox']['Left']))
             print(" Width: " + str(instance['BoundingBox']['Width']))
             print(" Height: " + str(instance['BoundingBox']['Height']))
             print(" Confidence: " + str(instance['Confidence']))
             print()

         print("Parents:")
         for parent in label['Parents']:
            print(" " + parent['Name'])

         print("Aliases:")
         for alias in label['Aliases']:
             print(" " + alias['Name'])

             print("Categories:")
         for category in label['Categories']:
             print(" " + category['Name'])
             print("----------")
             print()

     if "ImageProperties" in str(response):
         print("Background:")
         print(response["ImageProperties"]["Background"])
         print()
         print("Foreground:")
         print(response["ImageProperties"]["Foreground"])
         print()
         print("Quality:")
         print(response["ImageProperties"]["Quality"])
         print()

return len(response['Labels'])'RESTFUL API 개발' 카테고리의 다른 글
| [Restful API] 나의 API 안에서 Open API 요청하기 _requests 라이브러리를 사용한 naver 검색 API (뉴스) (0) | 2024.05.29 |
|---|---|
| [Restful API] Open API _naver 검색 API (뉴스) 사용하기 위한, 애플리케이션 등록 방법 및 API 설명 보는 법 (0) | 2024.05.29 |
| [Restful API] 사진 / 파일 업로드 하는 API _ boto3를 이용해서 S3에 업로드 하기 (0) | 2024.05.28 |
| [Restful API] Postman 로그인한 유저만 처리하는 API에 토큰 처리하기 (0) | 2024.05.24 |
| [Restful API] Flask에서 JWT 사용 _ 5. 토큰 유효기간 만드는 방법 (0) | 2024.05.24 |


